Trending Topics

 Trending
How to uninstall OneDrive properly on Windows 10 and 11

For many Windows users, OneDrive is a useful safety net: automatic backup, seamless sync and easy access to files across devices. But if you prefer local storage, use another cloud provider, or simply want a cleaner File Explorer, OneDrive can feel intrusive.
While Microsoft makes it look like you can remove it with a couple of clicks, a proper uninstall takes a few more steps. So here’s how to uninstall OneDrive properly, without breaking your folders or leaving Windows confused about where your files live.
Why uninstalling OneDrive isn’t as simple as it looks
Windows treats OneDrive as part of the operating system. Even if you uninstall the app, Windows may leave behind:
- Sync settings
- Backup redirections for default folders such as Desktop, Documents and Pictures
- File Explorer shortcuts
If you skip the cleanup steps, you can end up with broken folder paths or Windows repeatedly asking you to “set up OneDrive” again.
Before you uninstall OneDrive
The steps you take to uninstall OneDrive properly depend on whether you have any data stored there.
If you have no files saved and just wish to get rid of OneDrive, then you can skip to step 4.
However, if there is data in OneDrive that you would like to keep and store locally, then follow all the steps below.
Step 1: make sure you download you data
OneDrive may have data stored in the cloud only. If you want to store everything locally or with a different cloud provider, you need to ensure it is all downloaded onto the computer first.
To verify if your files are downloaded, first open your OneDrive folder and check the status icons.
Green tick (solid) → File is fully downloaded and safe to move
Blue cloud icon → File is online‑only and must be downloaded first
Green tick (outline) → File is available offline but still managed by OneDrive
If you can see blue cloud icons, you’re not ready to uninstall OneDrive just yet. You first need to download everything, and the quickest way to do this is to:
Open your OneDrive folder in File Explorer

Hold down the Ctrl key and press A to select all the files and folders within OneDrive.
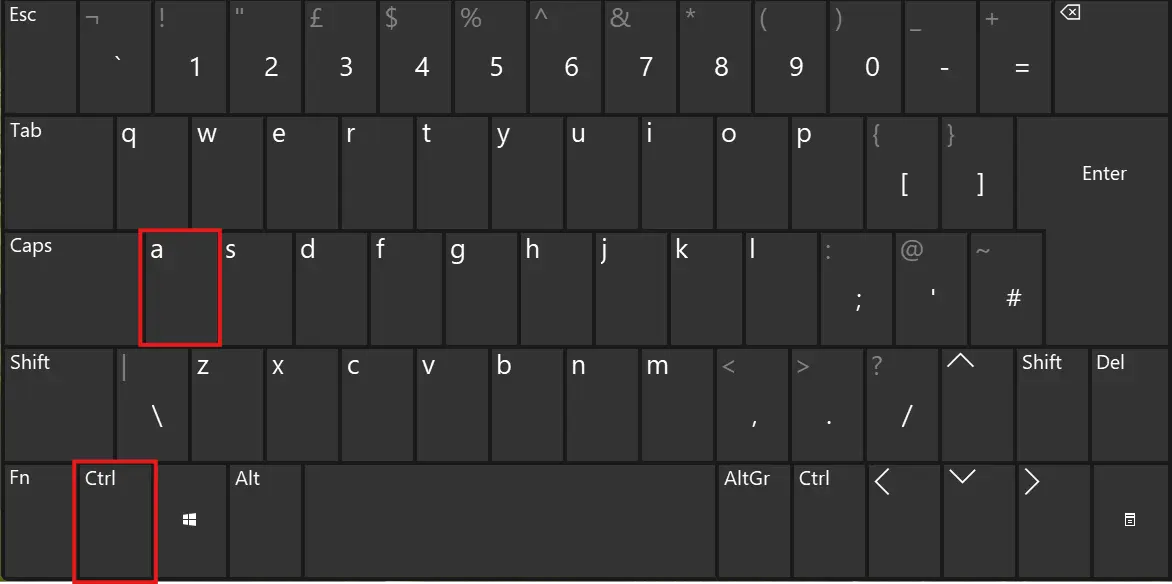
Now right‑click and choose Always keep on this device from the menu that appears.
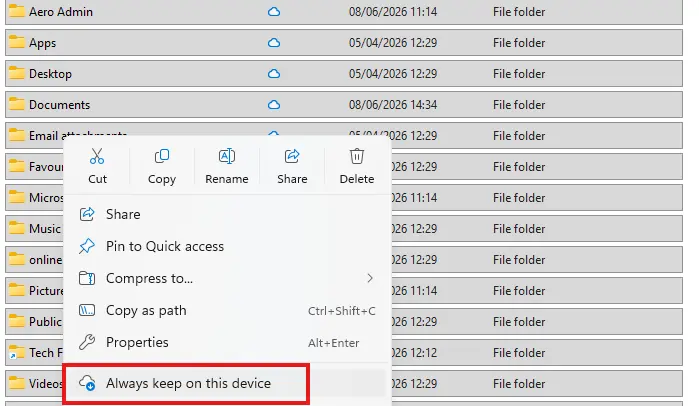
Windows will begin downloading all cloud‑only files. Depending on your connection and how much data you have, this may take a while — but it’s the safest way to ensure nothing is missing.
Step 2: Reset folder backup
If you have previously used OneDrive to back up any of the default folders – Desktop, Documents, etc. – Windows may still think those folders belong there. To remove OneDrive properly, you need to ensure Windows is using the local folders for storage instead.
To do this, first right-click the Start icon and select System
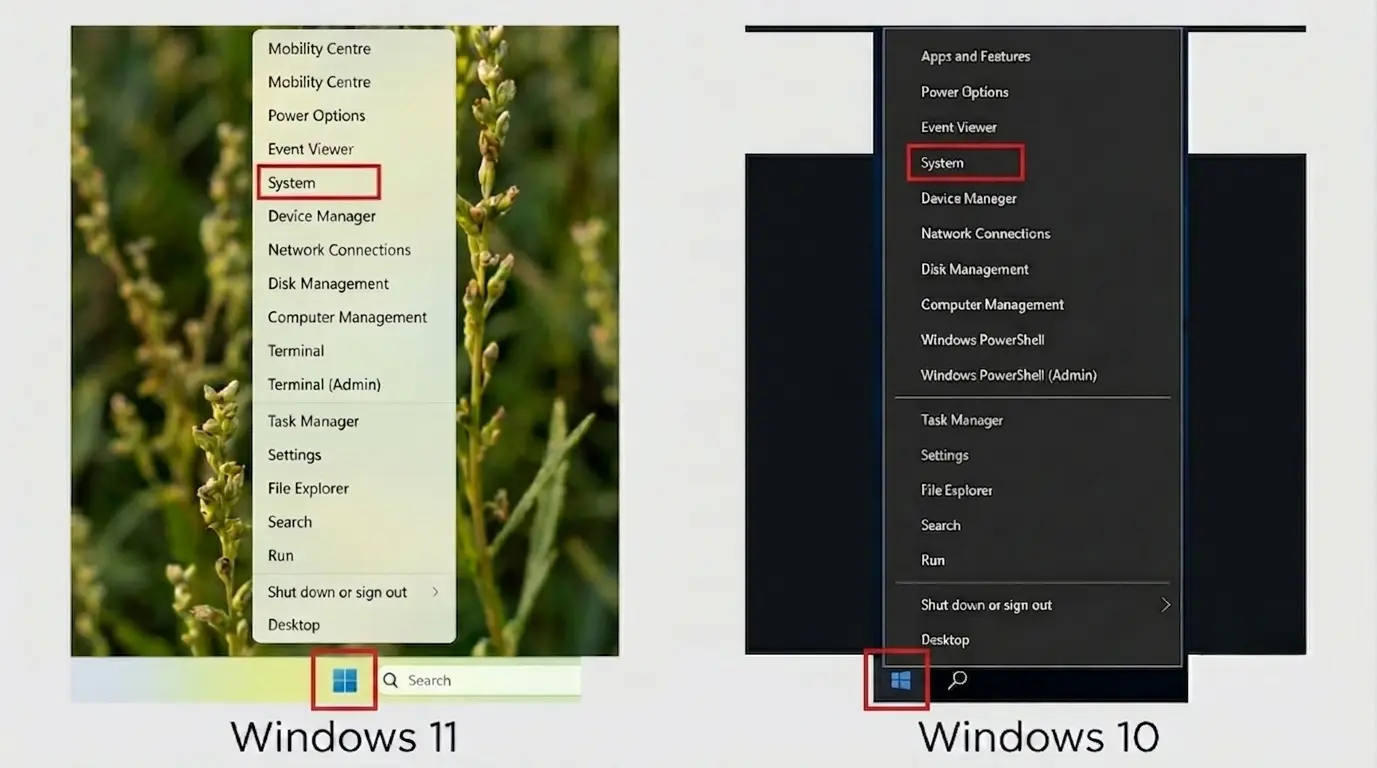
Now select Storage on the left-hand menu for Windows 10 and on the right-hand side for Windows 11.

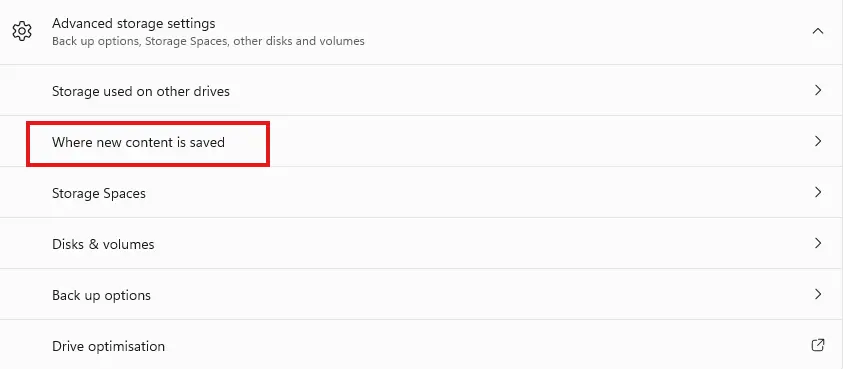
Next, in Windows 11, click on Advanced Storage settings and then select Where new content is saved.
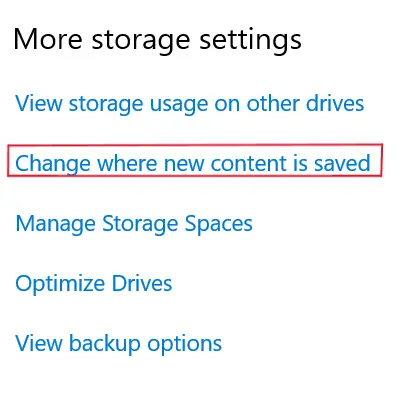
For Windows 10, scroll to the bottom of the right-hand pane and select Change where new content is saved under the More Storage settings heading.
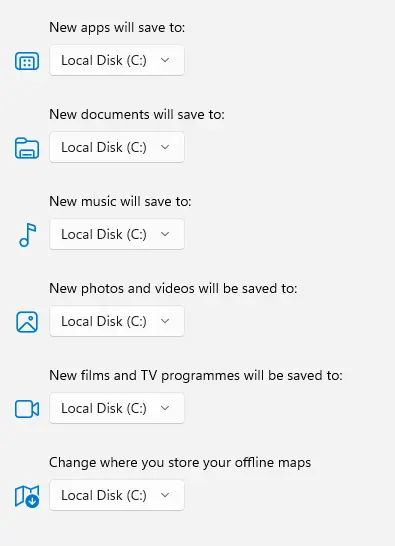
Now make sure that each folder listed points to your local drive, not OneDrive.
Step 3: How to move your data from OneDrive back to the local folders
Following Step 2 allowed you to reset your default folders to your local drive instead of OneDrive. You now need to move your files from the OneDrive versions of those folders to the local ones.
This step will remove everything from OneDrive. If you want to keep some files in the cloud, move only the items you want to store locally.
Below is an example for moving data from the Documents folder in OneDrive. The same method applies to the other folders such as Desktop, Pictures etc.
Open C:\Users\<your account name>\OneDrive\Documents, which is the default OneDrive Documents location. If you chose a different place during OneDrive setup, open that location instead.
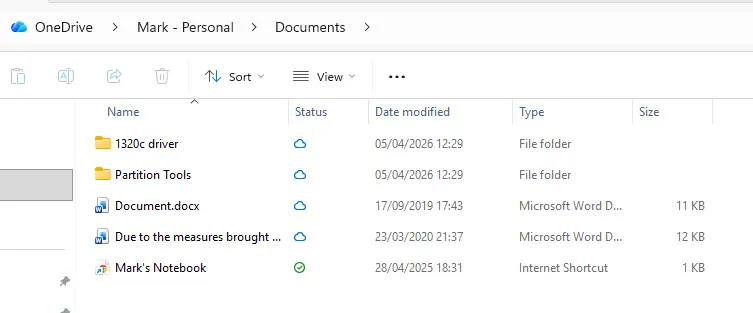
Now select all files and folders by holding down the Ctrl key and pressing A
Next hold down Ctrl and press X to cut (or right‑click and select Cut from the menu that appears)
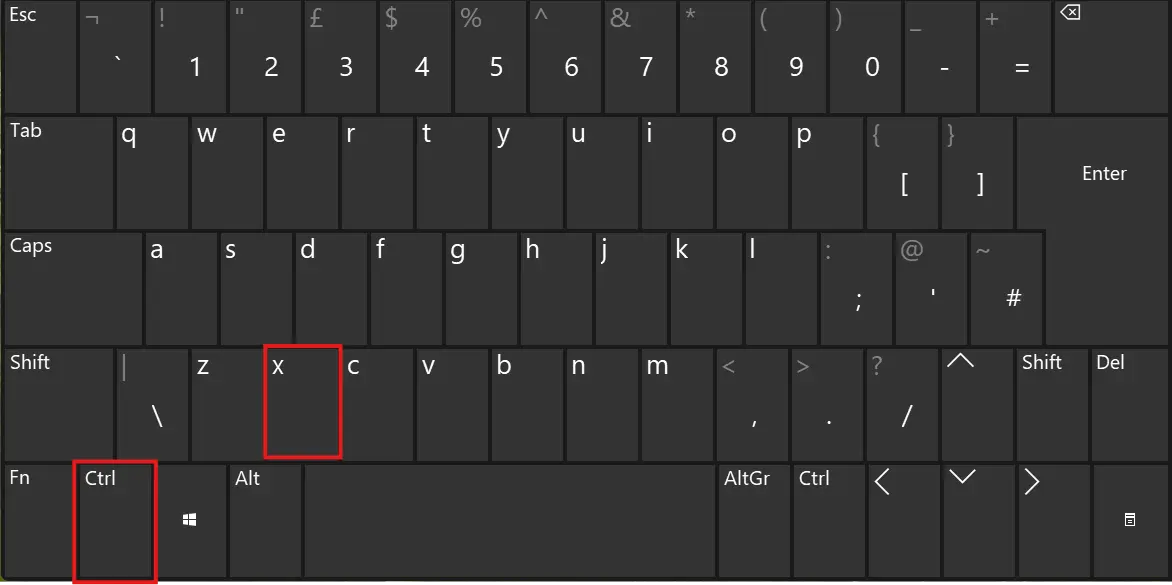
Finally, open the local Documents folder, which you should find at C:\Users\<your account name>\Documents, and paste the files by pressing Ctrl + V (or right-click and select Paste from the menu).
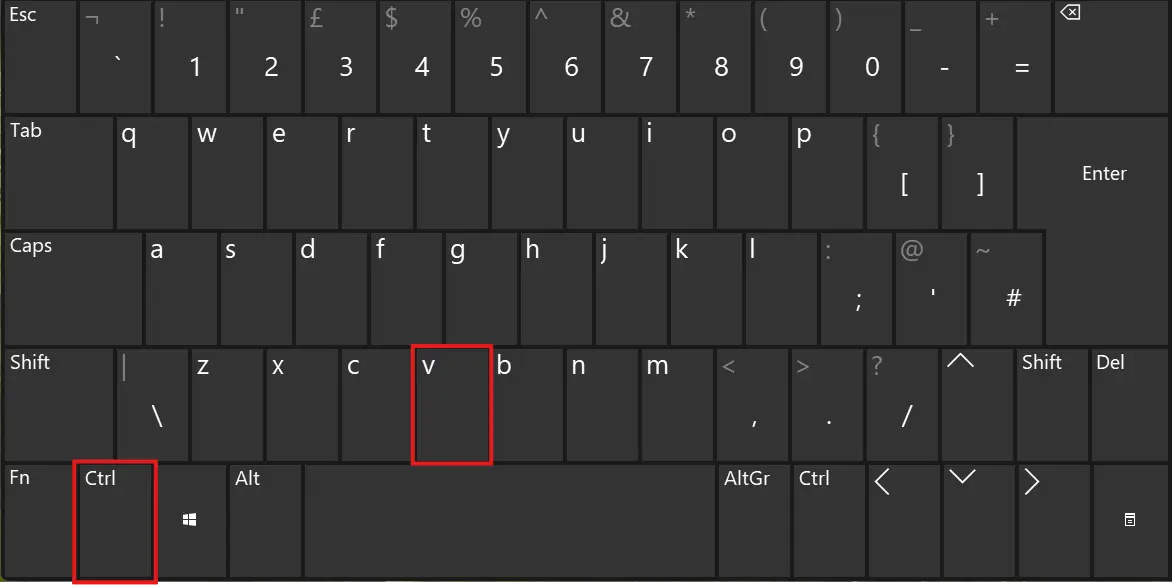
You can use this same process for your other default folders and any additional files stored in OneDrive.
Once you are happy you have moved everything across that you need to store locally, you can now start removing OneDrive properly.
Step 4: Unlink your PC from OneDrive
Before you uninstall OneDrive, you need to stop the sync process first.
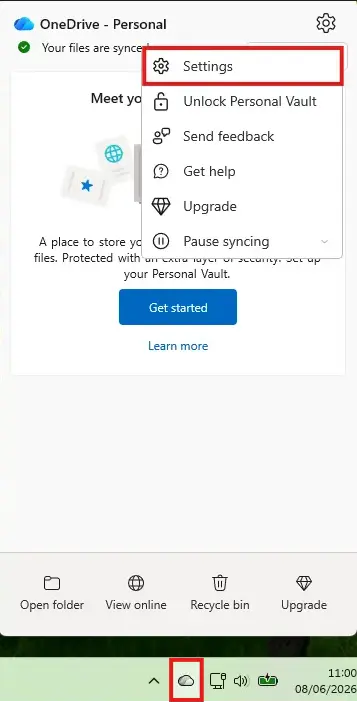
Right -click the OneDrive cloud icon in the taskbar and select Settings from the menu that appears.
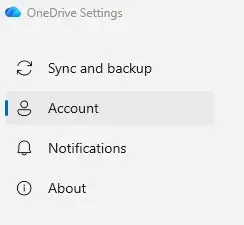
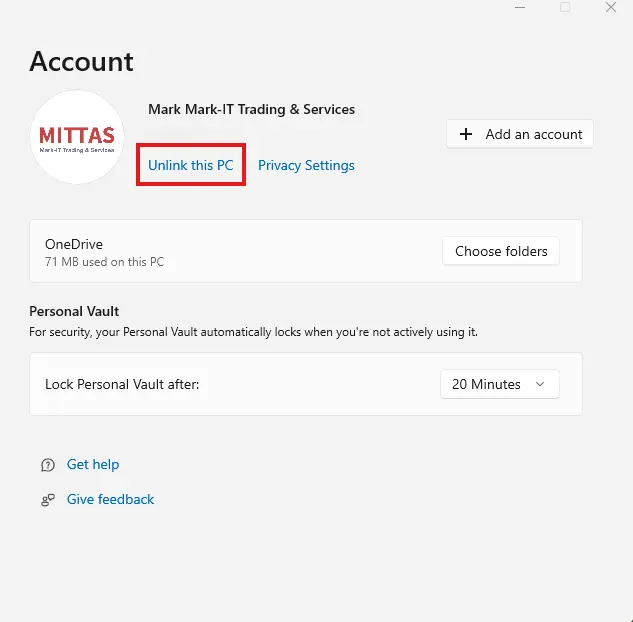
Now click on Account from the left hand pane.
Next, select Unlink this PC from the right-hand side of the window.
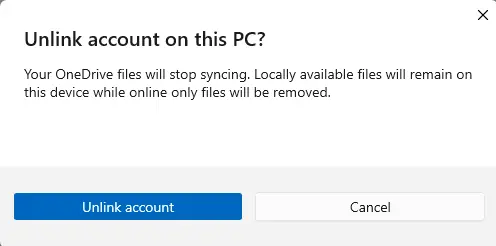
You will need to confirm you are happy to unlink the account. If so, click the blue Unlink account button.
Step 5: Quit OneDrive completely
You can now close OneDrive. To do so, right-click the OneDrive cloud icon in the taskbar and select Quit OneDrive from the menu that appears.
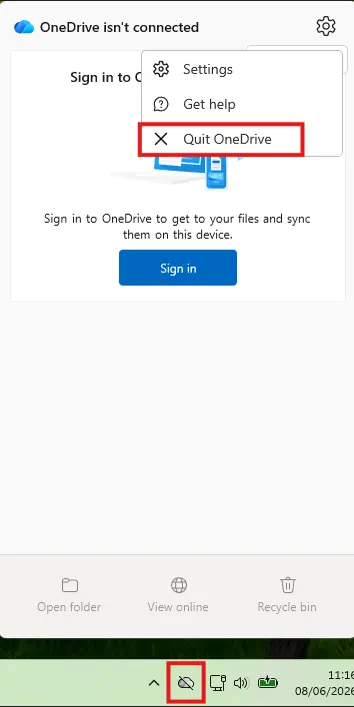
This ensures the sync client isn’t running during removal.
Step 6: Uninstall OneDrive via Settings
Now you need to remove the application itself.
Right-click the Start icon and select Installed apps if you are using Windows 11 and Apps and Features for Windows 10.
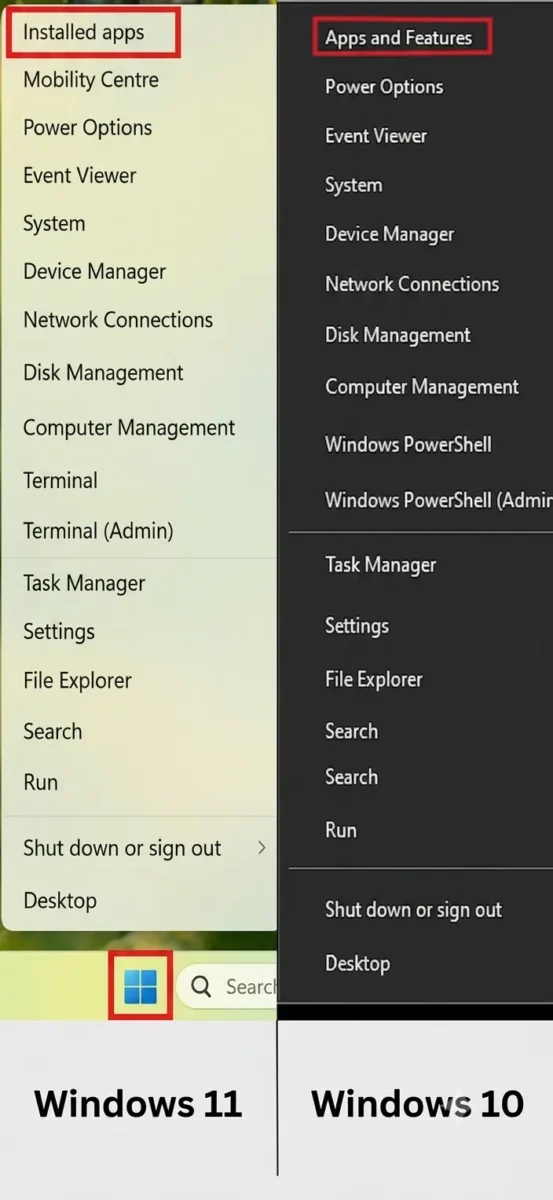
Next search for Microsoft OneDrive in the right-hand side list and then, on Windows 11, click the three dots and select Uninstall. For Windows 10, click on the words Microsoft OneDrive and then hit the Uninstall button.

This removes both the sync client and the File Explorer integration.
Step 7: Remove leftover OneDrive folders
You can now delete the OneDrive folder from your user profile. You usually find this at C:\Users\<your account name>\OneDrive, unless you chose a different location when you first set up OneDrive.
This will delete any data left in the folder, but it should still be available in the cloud at onedrive.com.
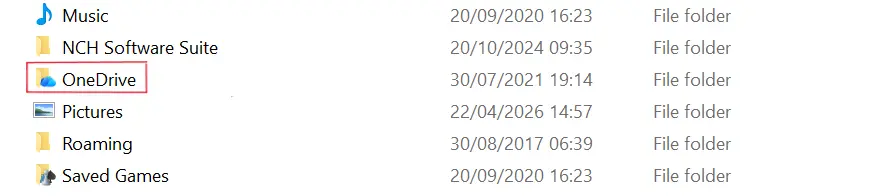
This will also remove the empty OneDrive entry from File Explorer’s sidebar once you restart Windows or sign out and back in.
More Windows advice from Mark Parvin
About The Author