Trending Topics

 Trending
The complete guide to securing your Wi-Fi and network on macOS

This is a sponsored article brought to you by Firewally AI.
Ask most Mac owners how they protect their network and you will hear two answers: they switched on the firewall, and they use a VPN. Both are sensible steps, and both leave out the part of the network that is hardest to see. The explanation for that is that your Mac collects and does things you cannot see. Storage has a hidden layer. App permissions have a hidden layer. The network has one too.
Securing a Mac’s network really comes in three parts. There is the Wi-Fi you connect to, mostly a matter of a few settings you get right once. There are the inbound doors, where other machines try to reach yours, which the built-in firewall handles well. And there is the outbound traffic, the connections your own apps open to the internet on their own initiative. The first two are visible and well documented. The third stays invisible for most people, and that is where the harder security questions live.
That invisible layer is why Nektony’s FireWally, a free firewall on the Mac App Store, was launched in December 2025. But first, let’s talk about what you can already do with the settings existing on your machine.
Start with the Wi-Fi you join
The Wi-Fi layer is the easy half, in the sense that you configure it once and it keeps protecting you. Start with encryption. Apple now recommends WPA3 Personal on your router, or WPA2/WPA3 Transitional if you still have older devices on the network. Anything older, WEP or TKIP or a mixed WPA/WPA2 mode, macOS will flag as weak security, and it is right to. To check what the network you are on actually uses, hold Option and click the Wi-Fi icon in the menu bar. macOS shows the security standard, the protocol, the channel, and the router address in a single panel.
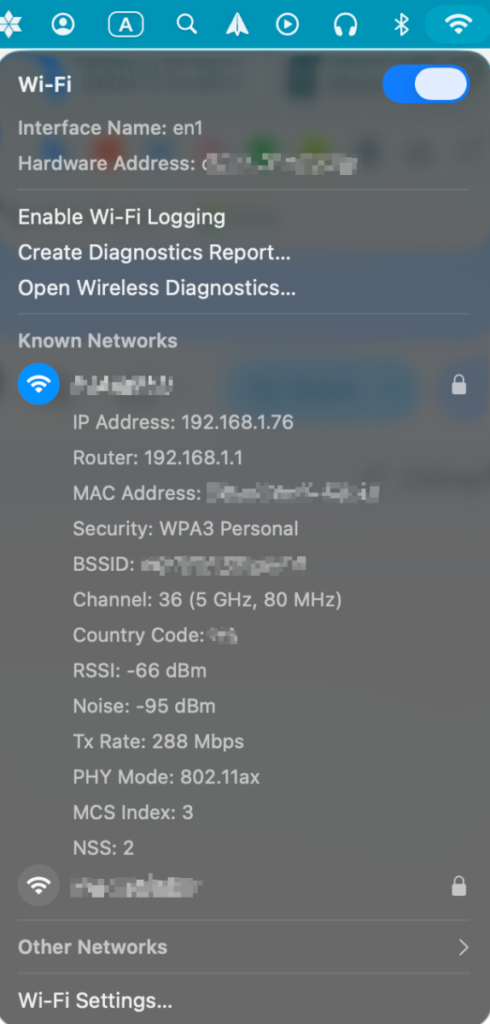
On networks you do not control, the honest picture is calmer than the headlines but far from empty. Because almost all web traffic is now HTTPS, a stranger on the same coffee-shop network can no longer read the contents of your sessions, and macOS applies Opportunistic Wireless Encryption on open networks to limit passive snooping. What remains is the metadata of where you connect, any traffic that is still unencrypted, and the social risk of an “evil twin”, a rogue access point named to look like the venue’s network so that you join it by hand. Treat an unfamiliar open network as a public space rather than a private one.
Two macOS privacy settings are worth knowing by name, because they are easy to confuse. Private Wi-Fi Address randomizes the hardware MAC address your Mac presents, so a network operator cannot follow that one address across visits. It is on by default; in System Settings, Wi-Fi, Details next to the network, you can set it to Off, Fixed or Rotating, with that three-way control available on macOS Sequoia and later. Separately, Limit IP Address Tracking routes your traffic through iCloud Private Relay so that trackers cannot use your IP address, and it requires an iCloud+ subscription. One masks the address the network sees, the other masks the address websites see. Both live in the same Details panel.
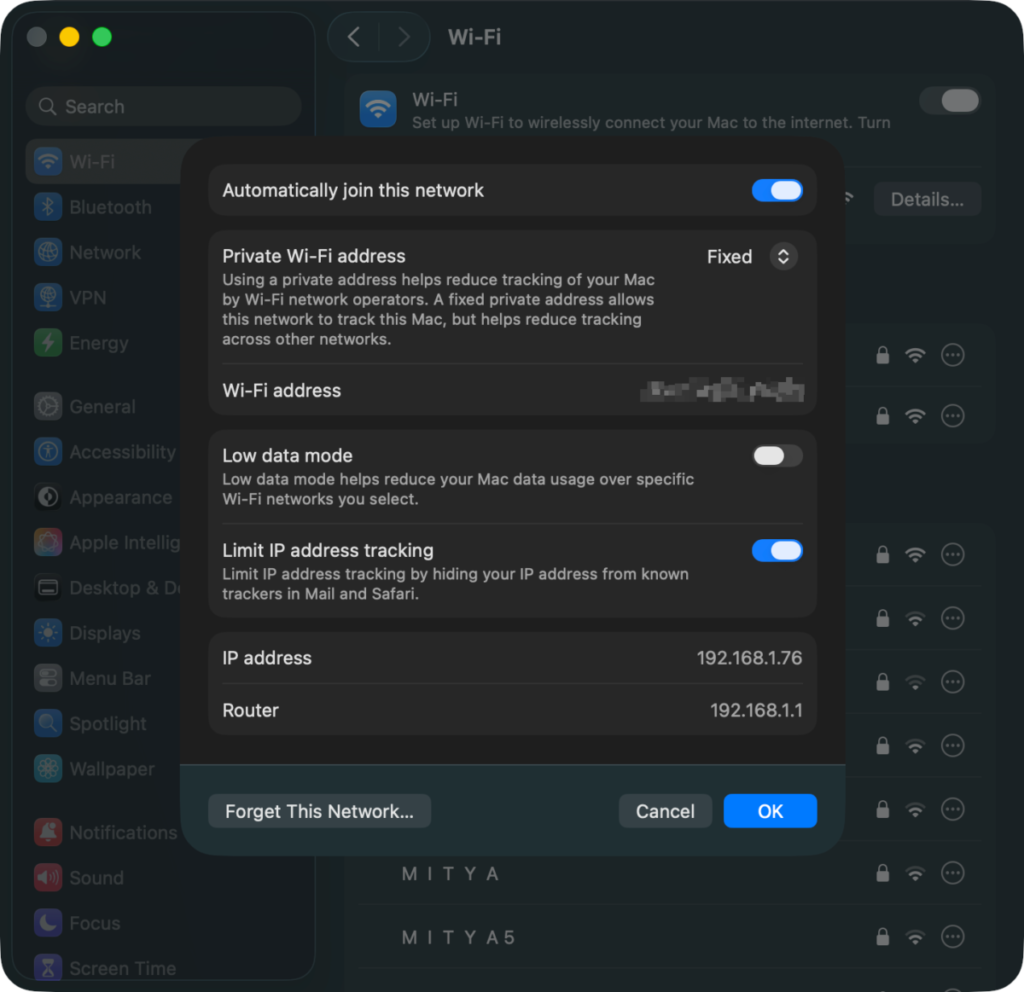
A word on iCloud Private Relay, because it is so often mistaken for a VPN. It encrypts your Safari browsing and all DNS requests and sends them through two separate relays, so that no single party, Apple included, knows both who you are and which sites you visit. It does not cover every app, and it is not a system-wide tunnel. It is a good default for browsing privacy and best relied on for exactly that.
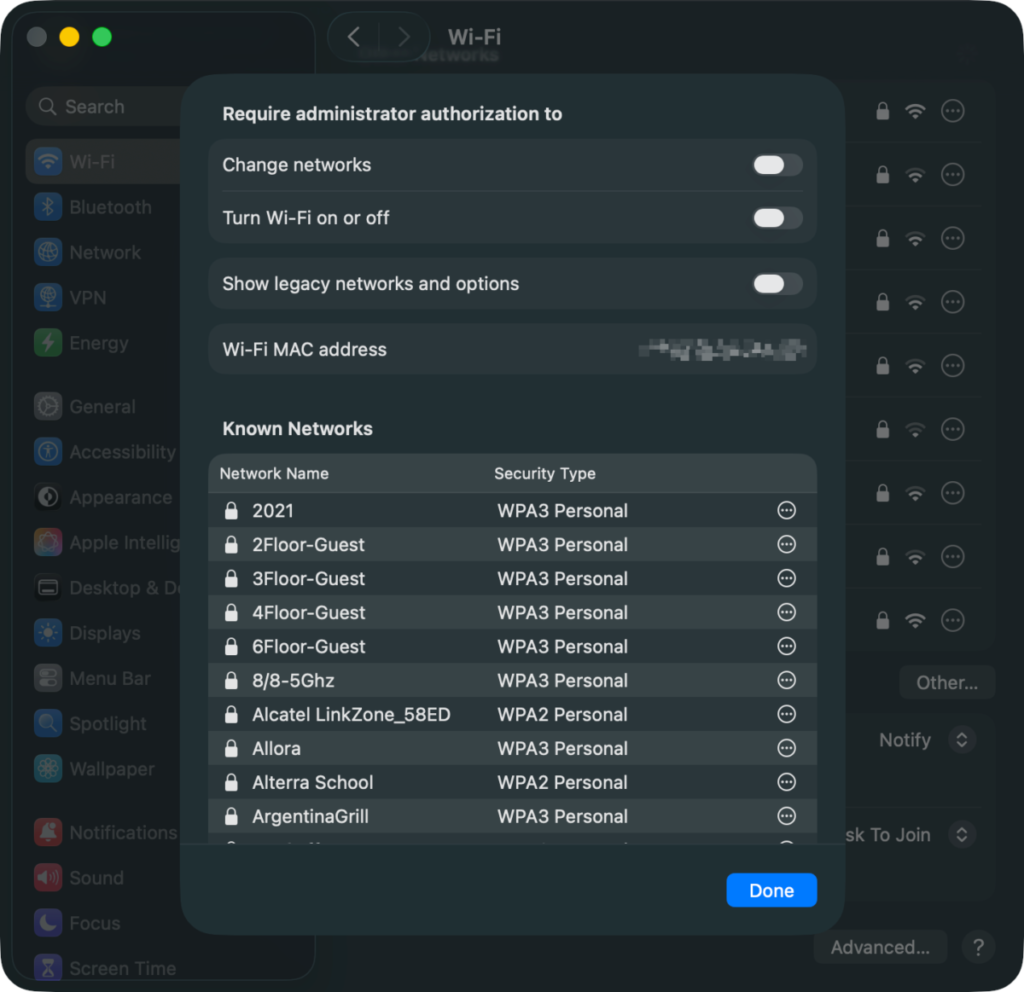
Finally, mind auto-join. A Mac reconnects to networks it remembers, which is convenient and occasionally a liability if someone spoofs a remembered open network. Apple limits the damage by not auto-joining open or captive networks you have not used in the past two weeks, and you can prune the rest under System Settings > Wi-Fi > Advanced, where the Known Networks list lets you remove any network you no longer trust.
The inbound doors: the firewall and the sharing services
This is the part people mean when they say they “turned on the firewall”, and turning it on is genuinely worth doing. The built-in macOS Application Firewall lives in System Settings, under Network, then Firewall. It is off by default, so switching it on is a real change rather than a confirmation. It governs one direction only: connections arriving from other machines. Inside its Options, you will find two settings worth using on a laptop that travels. Block all incoming connections cuts off nonessential services, and stealth mode stops your Mac from answering uninvited probes such as pings, so it does not announce itself on a strange network.
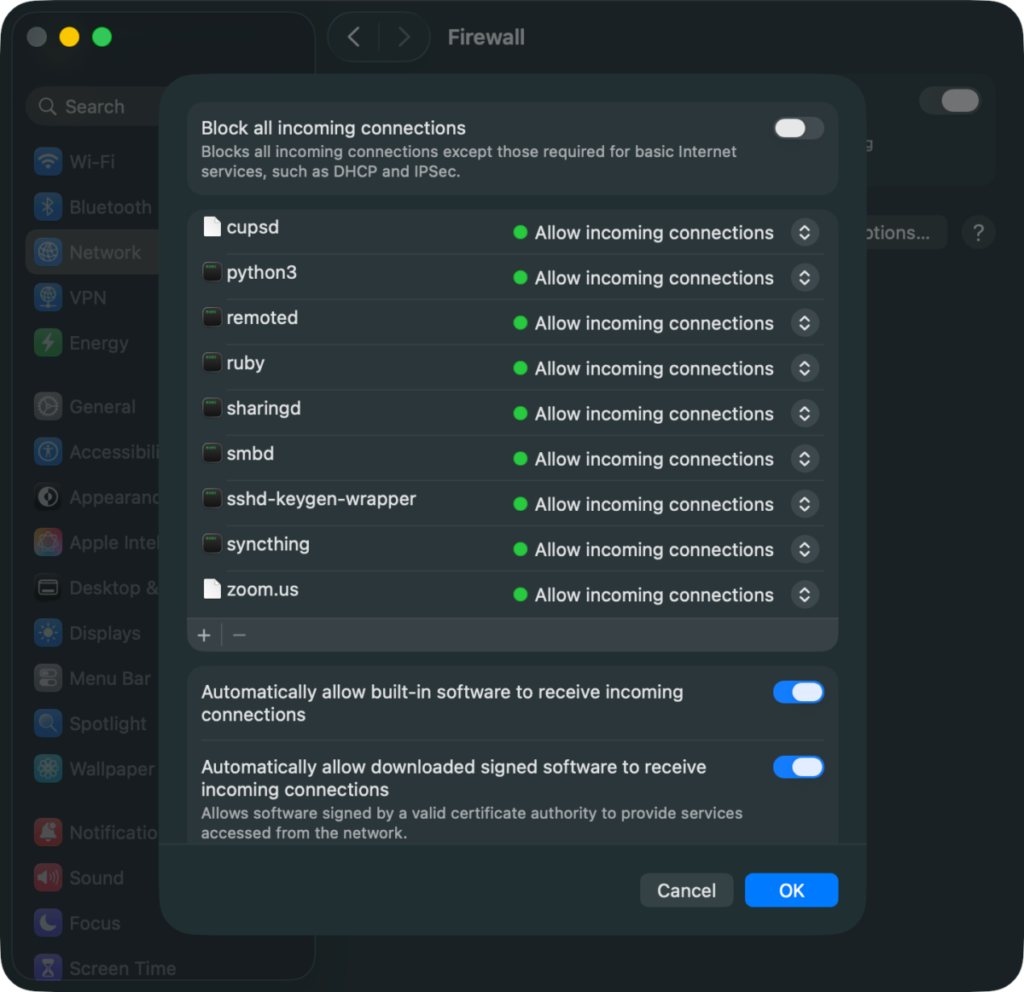
The firewall is only half of the inbound story, though. Every sharing service you switch on opens a listening port. Under System Settings > General > Sharing you will find File Sharing over SMB, Screen Sharing over VNC, and Remote Login, which is SSH on port 22. Each one is a door that accepts connections: useful exactly when you are using it, and a quiet exposure the rest of the time. A general tip is to open that pane and turn off anything you’re not actively relying on this week. AirDrop belongs in the same review; set its receiving mode to Contacts Only, or Off, from Control Center rather than leaving it open to everyone.
The part you can’t see: outbound traffic
Here is where the built-in tools stop. The macOS firewall does not filter the outgoing direction at all. Nothing in System Settings shows you, app by app, what your Mac is sending out, and your Mac sends out a great deal. macOS itself reaches the internet on your behalf: when you launch a signed app, a background process called trustd contacts Apple’s OCSP service to confirm the developer’s certificate has not been revoked. On top of that, your apps phone home for updates, activation, telemetry, crash reports, cloud sync and, in the free ones, advertising. Most of it is routine. Some of it is an app connecting far more often, and sending far more, than the task in front of you would suggest.
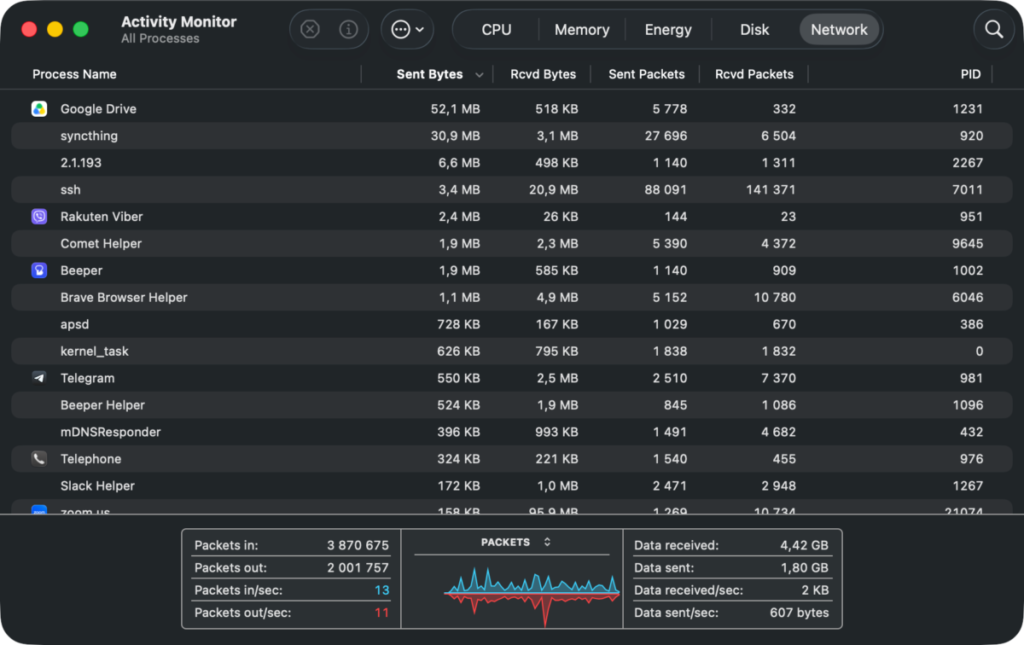
You can see much of this with tools already on the machine. Open Activity Monitor, switch to the Network tab, and sort by bytes sent. Leave it running for a day and the pattern reveals itself: the processes at the top of that list are rarely the apps you actively use. They are the menu-bar utilities, the abandoned trials, the helpers that installed themselves alongside something else.
The trouble is that this view give you numbers without context. Activity Monitor tells you a process sent 400 MB; it does not tell you whether that is a legitimate sync or something worth stopping. Turning those numbers into decisions is the slow part, and it is the reason a dedicated outbound monitor earns its place. Tools in this category, Little Snitch, LuLu, Radio Silence and Nektony’s FireWally, all give you the outbound view the system withholds, with a switch to block any single app.
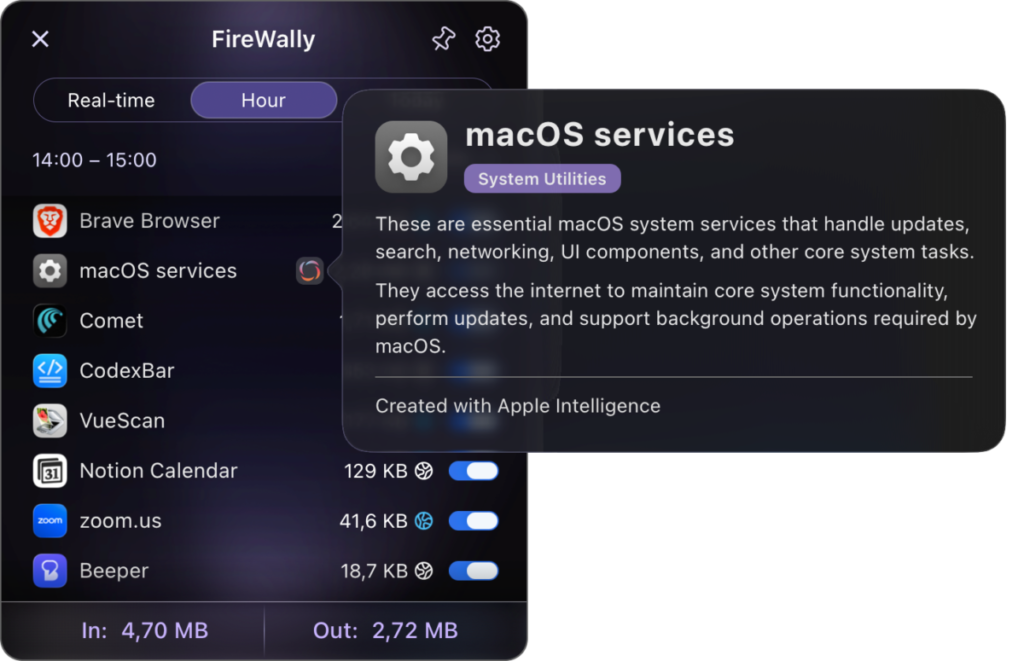
However, FireWally is the free option in that group. It shows, in real time, which apps and background processes are connected and how much data each is moving, it blocks any of them with one toggle, and it uses Apple Intelligence to explain in plain language why an app is reaching out, which is the part of the manual routine that normally sends you to a search engine. It reads traffic volume and destinations only; the contents of your files and messages are never part of what it sees.
One clarification belongs here, because it comes up every time. A VPN does not solve the outbound problem. It reroutes your traffic through an encrypted tunnel and hides it from the local network, which is useful, but it does not stop any app from phoning home. It changes the route your traffic takes to the internet, while leaving every app free to keep reaching out. If your concern is which apps are talking and which you want to allow, that is a question of visibility and control, and a VPN gives you neither.
Encrypted DNS and the extreme end
Two further layers are worth a mention for the people who want them. Encrypted DNS, both DNS over HTTPS and DNS over TLS, has been supported natively since macOS Big Sur, though there is still no field in System Settings to type a server into. You enable it by installing a configuration profile from a provider you trust. It keeps the names you look up from being read or tampered with on the local network, which closes one of the gaps that survives even on an HTTPS connection.
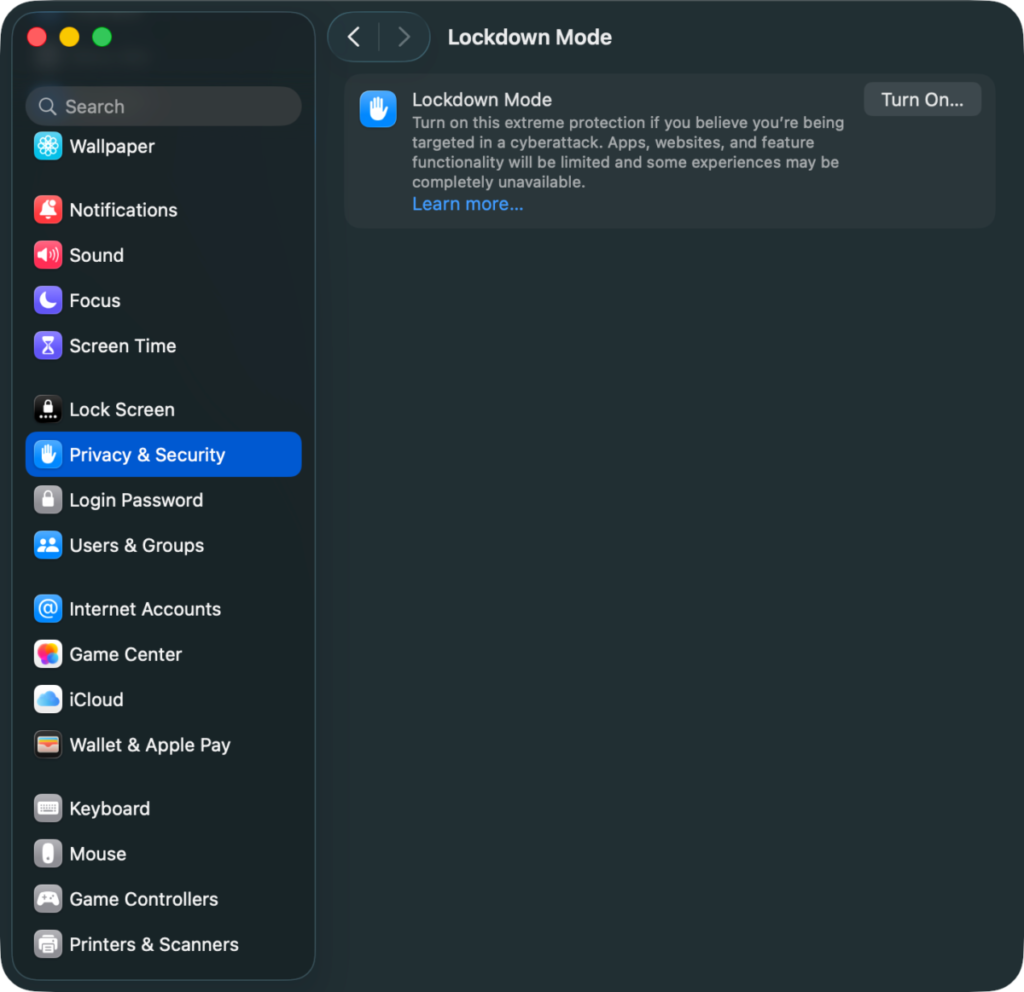
At the far end sits Lockdown Mode, under System Settings > Privacy and Security. Apple is direct that it is built for the very few people who might be targeted by mercenary spyware, and that most users will never need it. It blocks most message attachment types, disables some complex web technologies, and refuses incoming invitations from anyone you have not contacted first. It is the right tool for a narrow group and overkill for everyone else, and for most of you, it is enough simply to know it exists.
A network routine worth keeping
If you take one thing from this, let it be the shape rather than any single setting. Securing a Mac’s network is a set of three habits rather than a single setting you toggle. Get the Wi-Fi settings right once: WPA3 on your router, Private Wi-Fi Address on, sensible caution on open networks. Audit the inbound doors whenever something changes: firewall on, sharing services off unless you are using them. And make the outbound layer visible, then look at it now and again, the same way you would glance at a bank statement.
That last habit is the one easy to skip, because until recently it took real effort. Open Activity Monitor this week, sort by data sent, and ask one honest question about the process at the top of the list. That single question, repeated monthly, will tell you more about your Mac’s real behavior than any one-time setup ever will. The principle underneath all three habits is you should be able to see what your computer is doing, and you should be the one who decides what it is allowed to do.
About The Author

Gabriel Jones
NEXT UP