
How to resize images in Windows
Changing the size of an image has always been pretty straightforward on a Windows PC or laptop. However, some new tools and the latest update to Windows 11 make it easier still. You can even save time with a batch-conversion tool.
We’ll cover all of that in this article, but let’s set out some basic principles first.
Maybe you need to make your image smaller so it takes up less space on your computer or fits specific dimensions for a website. Making images smaller is usually straightforward, and we cover some one-click methods for doing so later on.
Making images bigger is more complicated because in almost every case they will become more blurry. As a rule, the more you increase the size of an image, the blurrier the results will be.
Resizing is easy using image processing software like Adobe Photoshop (expensive) or GIMP (free). You could even ask AI systems to compress or resize an image for you. However, we have bad news if you want to use Copilot. When we dragged an image into the AI panel built into the latest version of Windows, it told us: “I do not have the ability to resize images or perform image processing.”
But there are plenty of options in Windows 10 and Windows 11 to adjust the height and width of your picture or photo to whatever size you need. Here are some of the easiest ways to resize images with Microsoft Windows.
Related reading: How to get the best AI art from Adobe Firefly in Photoshop
Microsoft Photos and Paint apps
Microsoft’s image-processing apps are built into Windows. Start by launching Microsoft Photos or Microsoft Paint and opening the image. Alternatively, find the picture in Windows Explorer, right-click the image and click “Open with”, then choose Photos or Paint.
In Photos, click the three dots at the top and click “Resize image”.

In Paint, look at the toolbar and click on the icon marked “Resize and skew”.
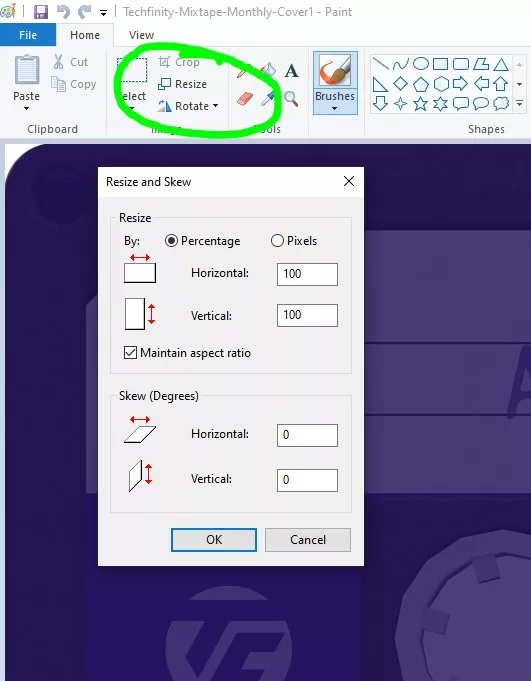
Both apps will keep the image’s original shape when you resize, so if you change the width it will change the height for you (and vice versa). If you want to stretch the image, unclick the chainlink icon between the width and height, then enter the new numbers manually.
As mentioned above, if you want to make the image bigger then it will become fuzzier. There is no way around this, unfortunately.
When saving in Photos, you can reduce the image’s file size by moving the Quality slider. The lower the quality, the less data it takes up when you’re uploading to a website or storing it on your computer.
You can also use Photos or Paint to crop an image.
Windows Power Toys
If you want to add extra functions to your computer, Windows Power Toys are clever little add-ons for Windows that you download to your computer. They’re similar to an app or extension. You can look through the Windows Power Toyls catalogue and install the ones you want.
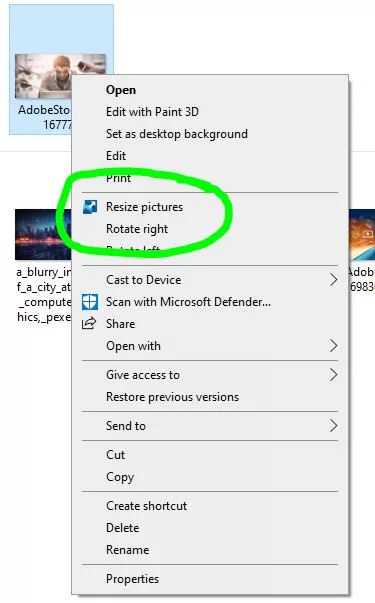
One of these is Image Resizer. It’s a Windows Shell extension that enables you to quickly resize one or several images by right-clicking from File Explorer. You can fill, fit or stretch images to pre-set dimensions, or you can specify your own size.
When batch resizing, your options include the ability to save copies rather than changing the size of the original image, and ensuring that Image Resizer only makes images smaller but not larger.
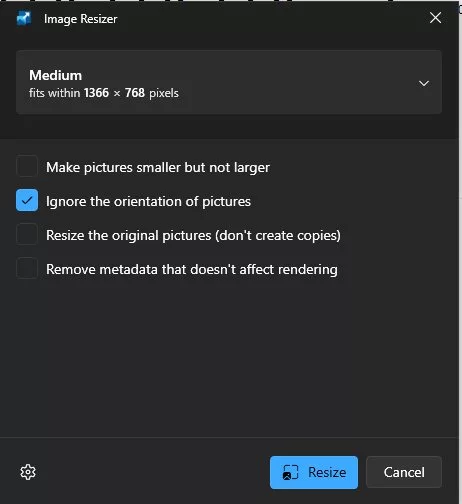
You can choose the dimensions of your resized image from the dropdown menu.

If you also want to rename multiple images while you’re at it, the PowerRename utility power tool will do just that.
More how-to guides

Richard Trenholm
NEXT UP

Ryan Beal, CEO & Co-Founder of SentientSports: “Sports generate some of the richest datasets globally”
We interview Ryan Beal, CEO & Co-Founder of SentientSports, a startup using AI in fan engagement and athlete protection on social media.

Paris 2024: The greenest games ever
How the Paris 2024 Olympic Gamers organisers have lived up to their promise that this is the greenest Olympics ever

Salesforce, Workday team up to launch AI employee service agent
Salesforce and Workday have marked their new strategic partnership with the launch of an AI-powered assistant to handle employee queries.