
How to get the best AI art from Adobe Firefly in Photoshop
AI is having a huge impact on the digital art world, so it was only a matter of time before the ten-tonne gorilla of the art software industry got involved. Adobe introduced its Firefly AI system earlier this year and has now started adding some of those tools to Photoshop. It is astonishingly powerful, but only if you know how to get the most from it. Here, then, is how to get the best AI art from Adobe Firefly in Photoshop.
Jump to:
How to find the AI features in Photoshop
Don’t spend ages poking around the endless Photoshop menus looking for the AI tools, because you won’t find them. At the time of writing, the AI features have only been added to the beta version of Photoshop.
The good news is that anyone with regular Photoshop included as part of their Creative Cloud package can download the beta. It happily runs alongside the stable version of Photoshop, so you don’t have to commit to experimental software if you use Photoshop professionally.
To download the Photoshop beta, open the Creative Cloud app on your computer, select Apps from the top menu, then Beta apps from the menu down the left-hand side. You should find the option to download the Photoshop beta there.
Add items to images
With generative AI art systems such as Midjourney, we’re now used to entering text prompts and getting an entire image of what we asked for. With Firefly AI in Photoshop, however, we can ask the AI to add different objects to our existing images.
Take this image of a sunny day in the English countryside, for example:

It’s a nice enough image, but it could do with a bit more visual interest in the foreground. How about we place a big oak tree on the left-hand side?
To do this in Photoshop beta, you draw a selection box of where you want the object to appear. Alternatively, you can take the lasso tool and draw the rough shape that you want the new object to be. (It’s faint, but you can just see the rectangle I’ve drawn in the image below.)
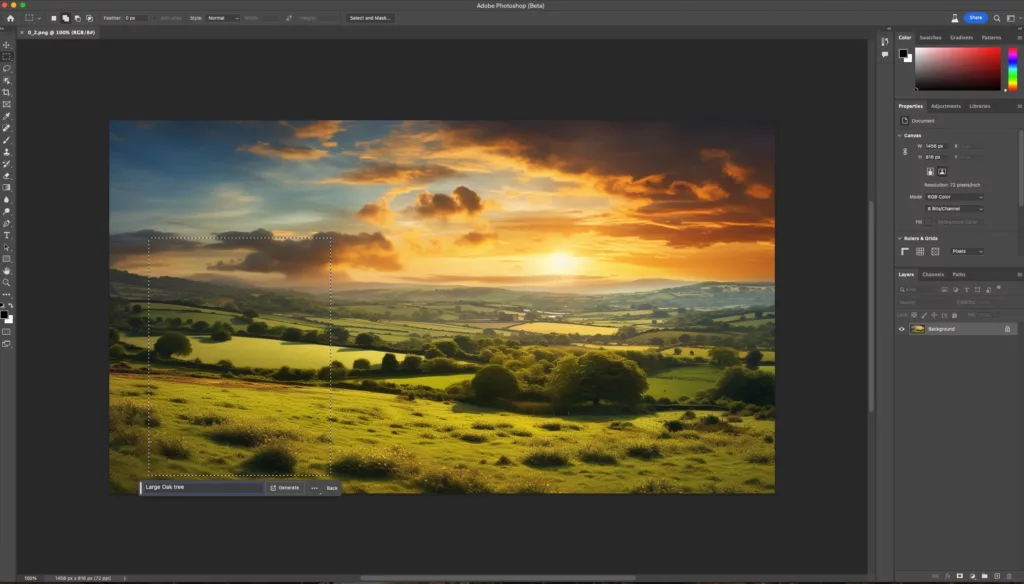
Once you’ve made your selection, select Generative Fill from the box that appears on screen, and describe the object that you want the AI to insert. Here, we’ve entered “large oak tree”.
You’ll be given three options to choose from once the image has been generated, and if you don’t like any of the options you can regenerate three more images, or tweak the prompt to see if you can get better results.

As you can see from our image above, the really clever thing about Firefly AI is that it doesn’t just plonk any old image of an oak tree onto the canvas. It matches the lighting and colours of the existing photo so that it looks natural in the environment.
Each AI addition is added to a separate image layer, making it easy to manipulate or remove later. You can add as many items as you like.
Replace items in images
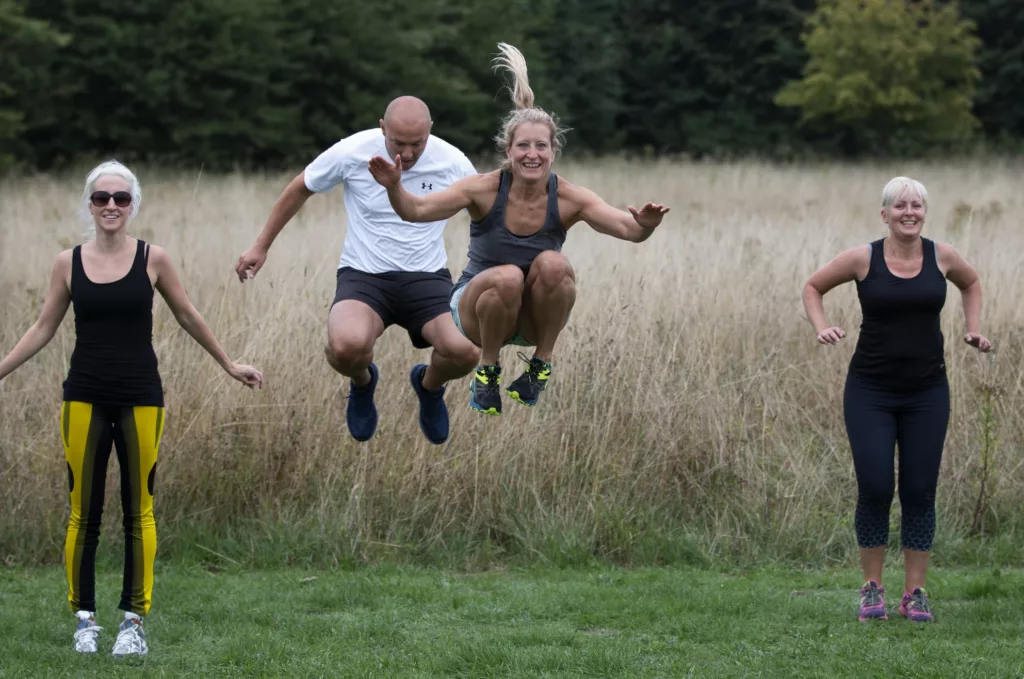
Firefly can not only add items to images in Photoshop, it can replace items too. Let’s take this photo I took of an exercise class:
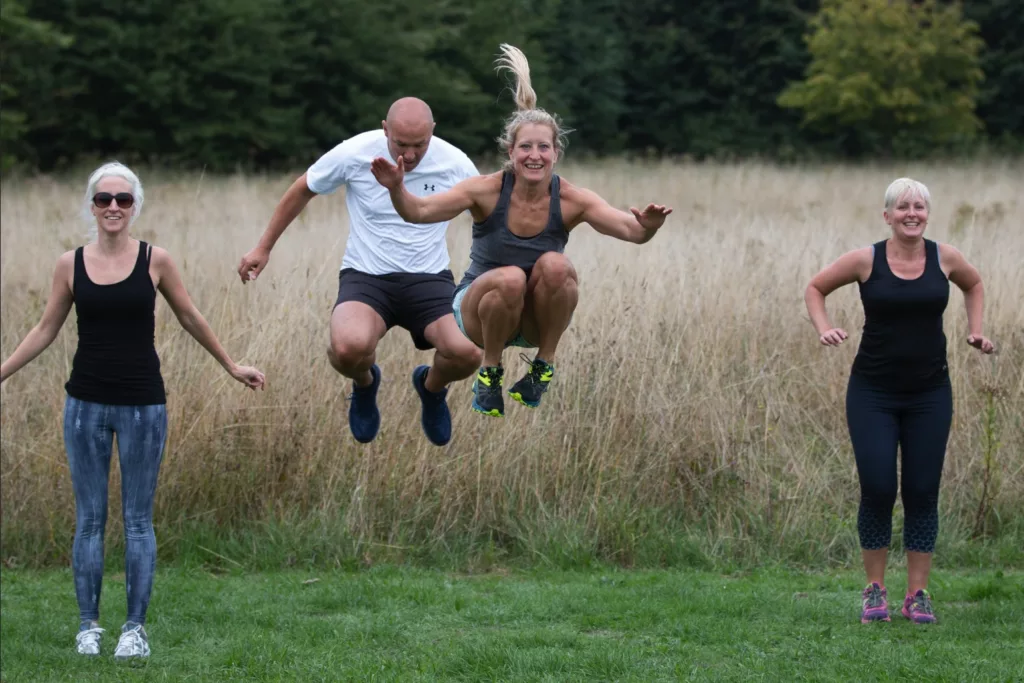
Let’s say we want to put the woman on the left of the frame into some more eye-catching leggings, maybe something a bit brighter. We can use the lasso tool to draw around the leggings. It doesn’t have to be precise, a rough selection will do, although make sure you get all of the item you wish to replace.
Then once again hit Generative Fill from the pop-up menu, describe the replacement object (here, yellow leggings), and…
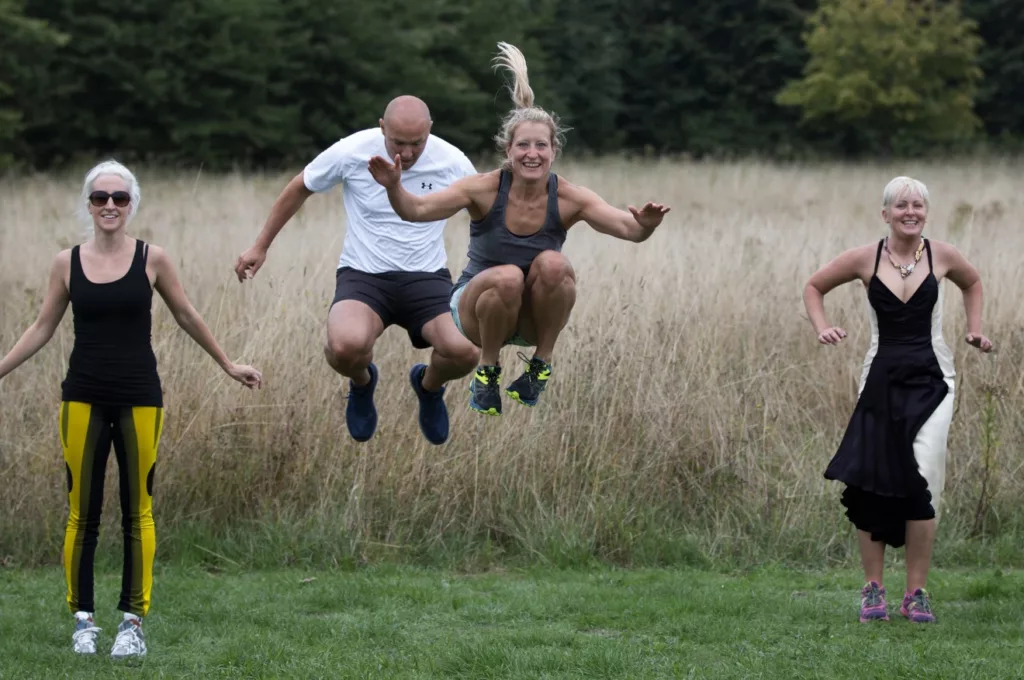
This feature’s also great for having a bit of fun with photos. For example, we can draw around the woman on the right-hand side and put her in a ball gown:
Expand and fill
Sometimes you’ve got a great image, but it’s just not the right size or aspect ratio to use where you want it. Let’s take this posed shot of a female model that you might want to use on the front of a fashion magazine, but the square format of the image isn’t the right aspect ratio for the A4 cover.

Here we can use a recent addition called Generative Expand to elongate the image and make it fit our magazine cover. You open the image in Photoshop, drag the crop handles to the new size that you want, and then simply leave the box that says ‘What would you like to generate?’ blank and hit Enter.
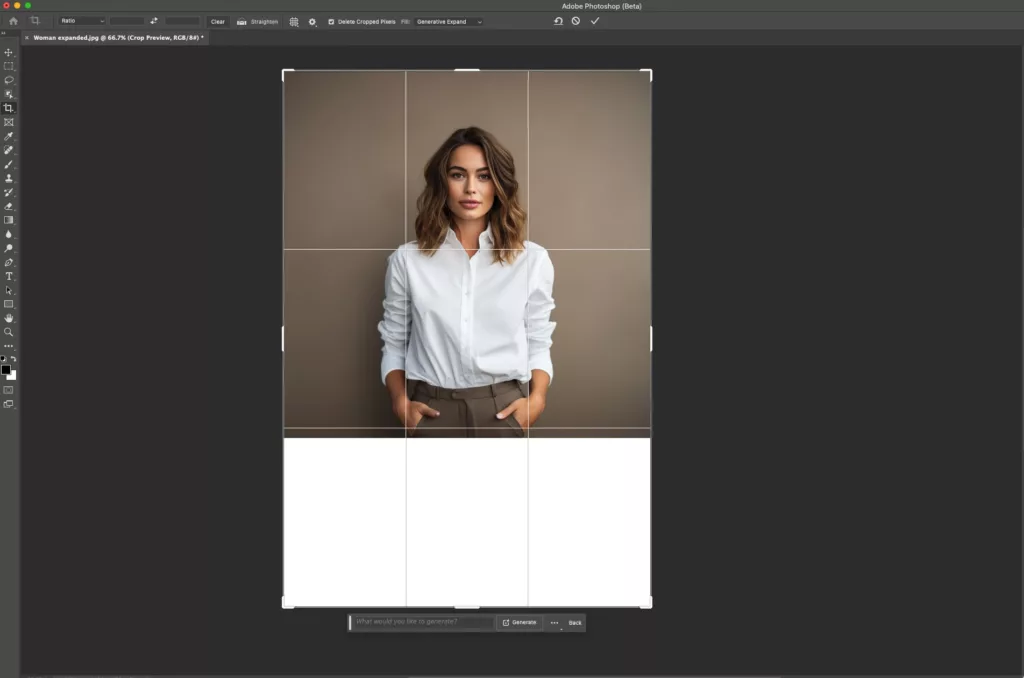
Photoshop fills in what it thinks the blank space should look like. Once again, you’ll have three options to choose from, such as this extended image that we could now use for our magazine cover:

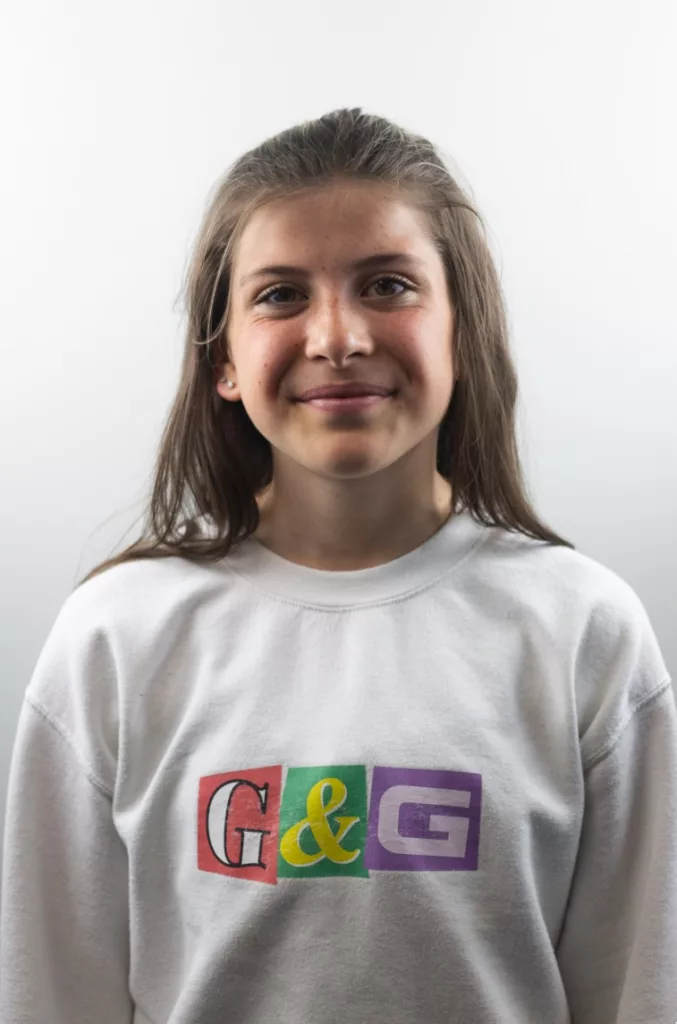
You don’t have to let the AI decide what goes in the blank space. Using the same Generative Expand tool, we can take this photo of my daughter, for example:
Expand the canvas to the left and ask it to fill with an “art gallery”:
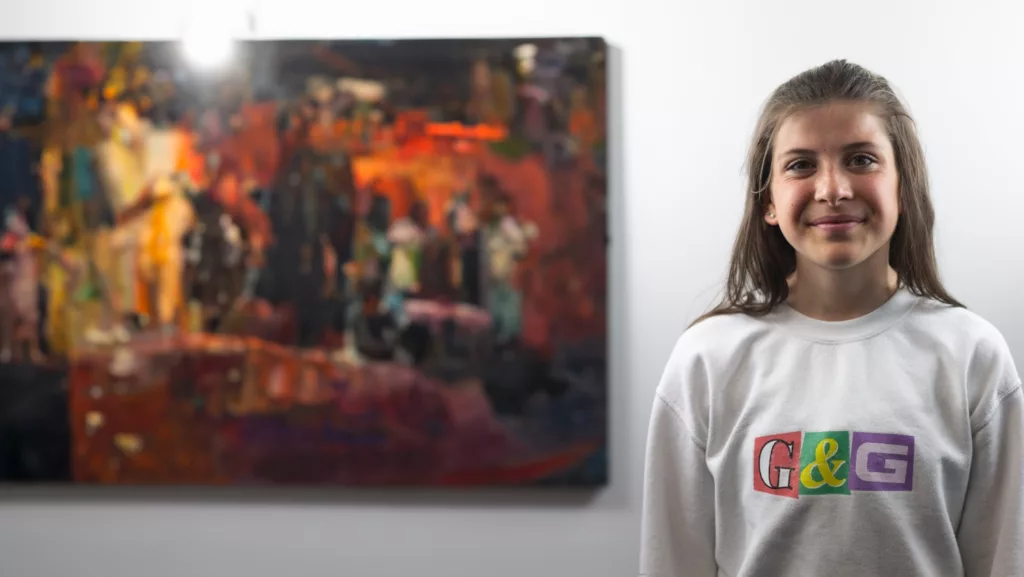
The nice touch here is that Photoshop realises the portrait of my daughter has a shallow depth of field and has consequently blurred the hanging picture in the background.
Final tips on how to get the best AI art from Adobe Firefly in Photoshop
Photoshop’s AI features are still in beta and they’re not always reliable. For some of the examples above, we had to make repeated attempts to get an image we were happy with.
It won’t always be possible to get the exact result you’re looking for, but perseverance and experimenting with different prompts will get you something usable more often than not.

Barry Collins
NEXT UP

Panos Skliamis, CEO of SPIN Analytics: “It’s important to see the changes we’re living through in the context of the transformations that have come before”
We interview Panos Skliamis, CEO of SPIN Analytics, an AI-driven platform that automates credit risk management and regulatory compliance

Why hiring for skills future proofs business operations in cyber and tech
For business operations in cyber, hiring based solely on previous experience and formal education is no longer practical, argues Ev Kontsevoy.

Riken to integrate IBM’s quantum system with supercomputer Fugaku
IBM and Japanese laboratory Riken have announced an agreement to deploy IBM’s quantum system and integrate it with supercomputer Fugaku