Trending Topics

 Trending
How to Record a Webinar on Mac or Windows?

Table Of Contents−
This article was made possible thanks to our sponsor, EaseUS
Webinars are becoming increasingly popular as a way to connect with the audience and share information effectively. They allow for real-time interaction and create valuable content that can be used later.
Recording webinars is important because it helps preserve this content, making it accessible for those who couldn’t attend and allowing you to revisit key discussions. In this article, we will explore how to record webinars on different devices, which makes the recording process super simple and effective.
Why Should You Record a Webinar?
Webinars are live online events that serve various purposes, from educating audiences to marketing products. They are commonly used for training sessions, product demos, and expert discussions. Recording your webinar can provide significant advantages, such as improved accessibility and the ability to repurpose content for future use.
Capturing your webinar ensures that all participants—both presenters and viewers—are recorded simultaneously. This is particularly valuable for complex or serious topics where audience interaction may be limited. By recording in advance, you can create a polished presentation that flows seamlessly and covers all essential information without interruptions.
EaseUS RecExperts makes this process straightforward, allowing you to easily edit your recordings for clarity and enhance overall accessibility. This way, you can ensure that your content is both engaging and informative for a wider audience.
How to Record a Webinar on Mac or Windows?
When it comes to recording a webinar, EaseUs RecExpert is the best choice. It is user-friendly screen recording software that includes a variety of unique features to record your screen activity and audio and webcam video. In addition, it has an auto-stop feature and scheduled recording options. Overall, EaseUs offers a comprehensive solution for screen recording and screenshot collection, which may be applied to a variety of private, professional, and instructional functions.
Record a Webinar on Windows
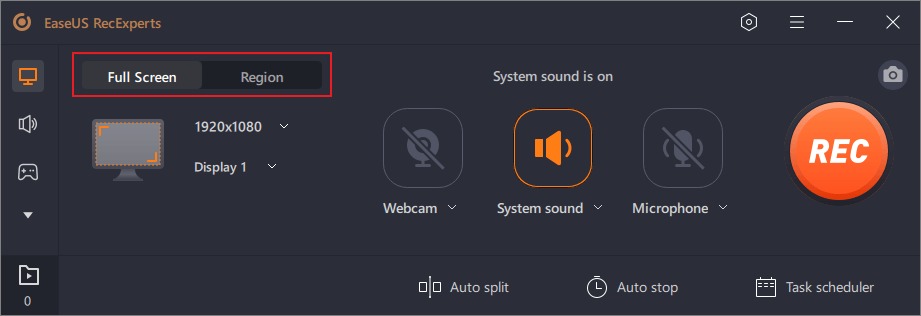
Step 1: First of all, open EaseUs RecExperts on your computer or Macbook. You will see an option titled full screen and region mode on your screen. Select either of them for recording. Now go to the meeting you want to record.
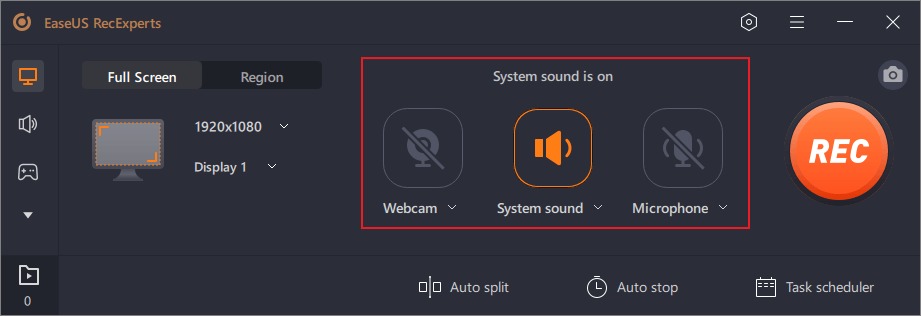
Step 2: After you are done with it, select the sound setting, whether it is webcam, microphone, system sound, or none of these, based on the options displayed on the screen.
Step 3: EaseUS RecExpert enables users to change their backgrounds using artificial intelligence or a green screen. You can change it using various options in the settings based on your preferences or the meeting’s demands.
Step 4: After you’ve finished with the sound and background settings, tap the red-circled recording button on the right of your screen to start recording. You can use the F10 and F9 buttons on your keyboard to stop or pause the recording of your webinar meeting.

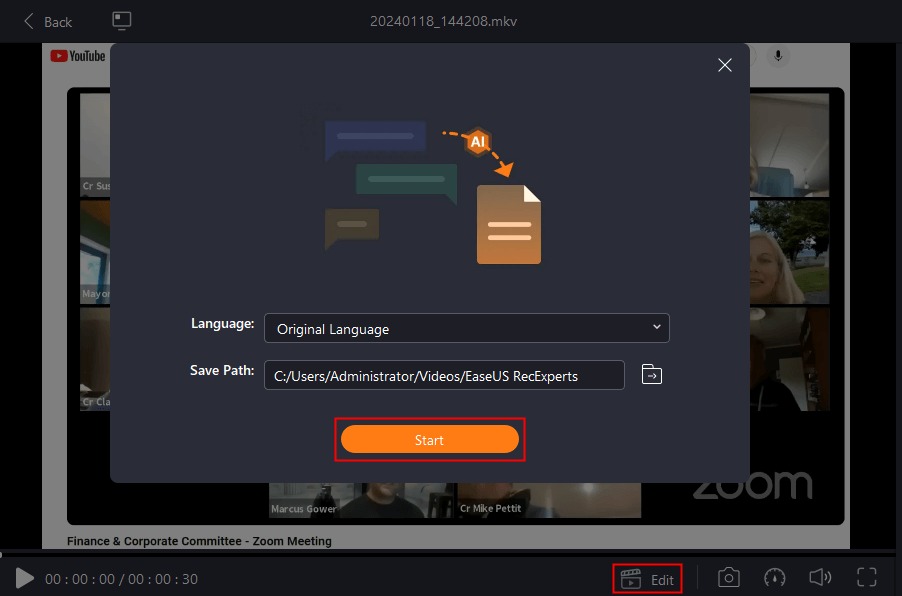
Step 5: After you finish recording, you can view the recorded videos in the pop-up list. You can even have a written form of the information in the meeting by tapping on edit, then AI assistant, and you are good to go.
Record a webinar on Mac
Step1: Firstly, install and open the EaseUS RecExperts for Mac. Then, join the meeting you want to record and choose a recording option, full screen or region.
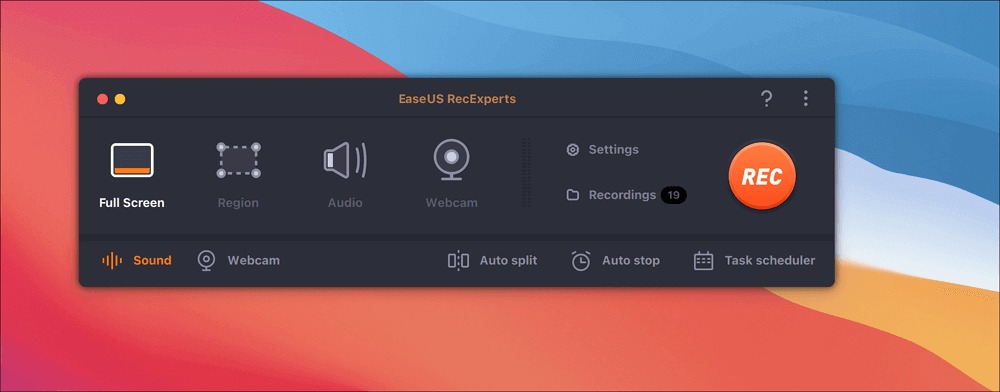
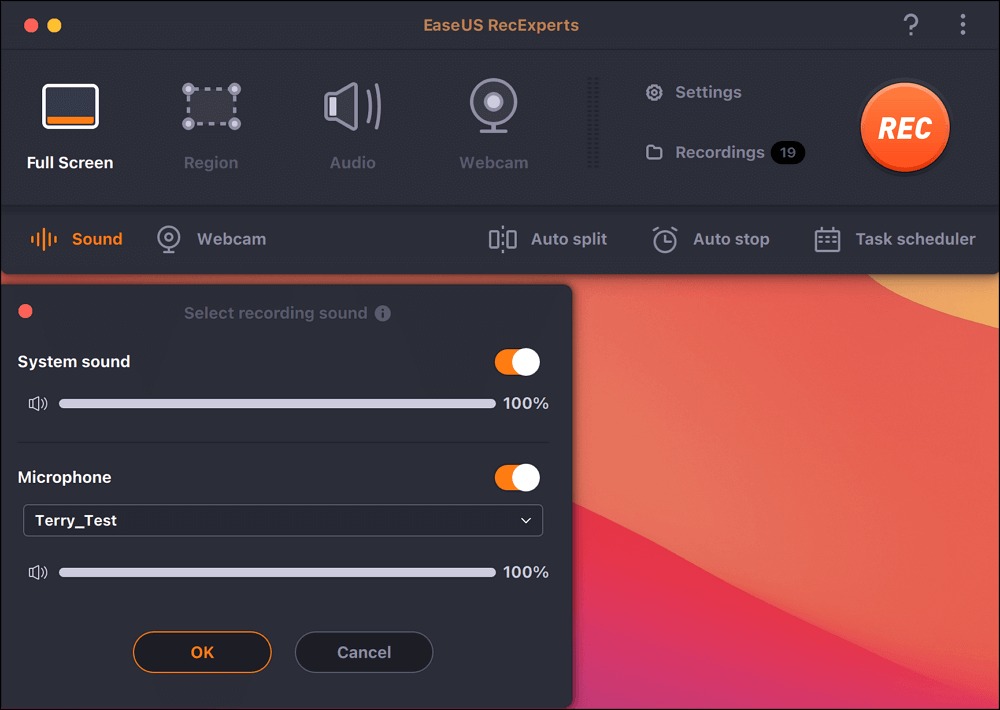
Step 2: To select the desired sound source, select from the sound settings in the left corner. You can easily choose from the audio sources, which are system sound or microphone sound.
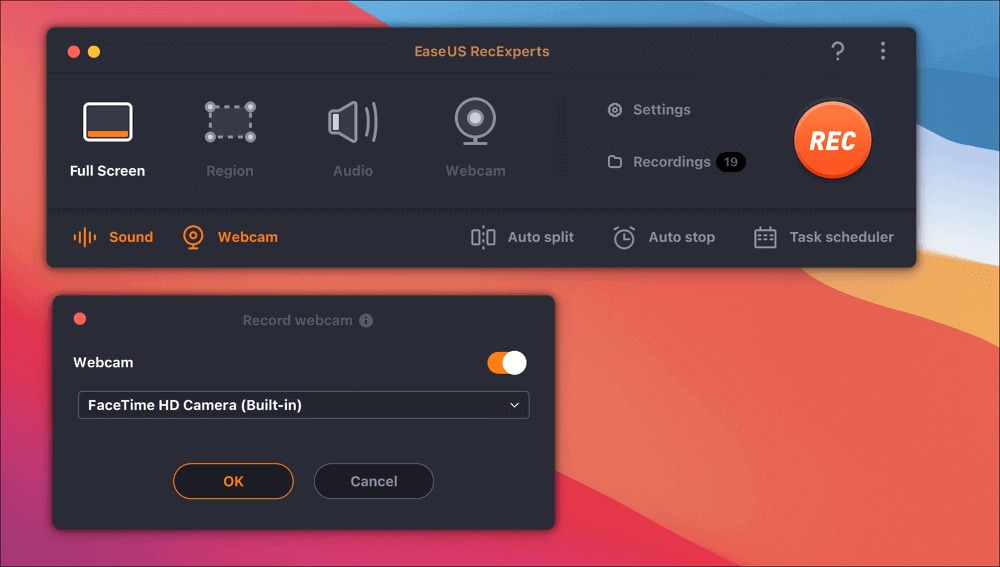
Step 3: if you want to record a webinar using webcam sound settings, activate your external camera as well as your built-in camera. After that, you can start recording by tapping the record button.
Step 4: While recording your meeting, you will see a floating toolbar from which the meeting can be easily paused or stopped mid-meeting. Moreover, click screenshots of important areas where necessary. After you are done with recording, you can click on the stop button on the floating toolbar.

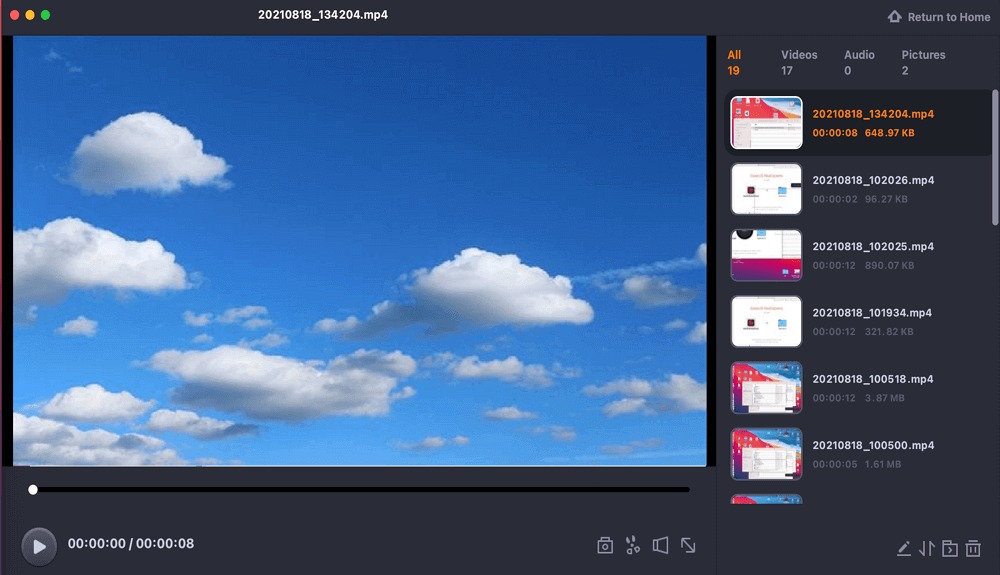
Step 5: After recording, a pop-up list will appear on your screen from where you have instant access to all recorded videos.
How to Use Online Free Webinar Recording Software?
You could use several online screen recording tools to record a meeting or webinar. Free online recording software allows you to record webinars, schedule them, and share them easily. By following the below-mentioned steps, you can get your job done quickly.

Step 1: When you join the meeting, start the recording software on the website and share your screen.
Step 2: Online recording software has features that can help you record screens and webinars without downloading any external app or software. Simply press the record button to start recording.
Step 3: When done, press the stop button to stop the sharing screen.
Step four: When you stop the recording, you are moved to the library, where all your recorded videos are stored. Once the video is saved, you can easily download it, edit it, and share it.
Record your webinar on iOS:
Recording a webinar or any other type of screen capture is simple to use, thanks to an iOS built-in feature. The embedded tool is made to make screen recording easy. The editing features in specific software are not available, though. To utilise it, you have to follow these steps:
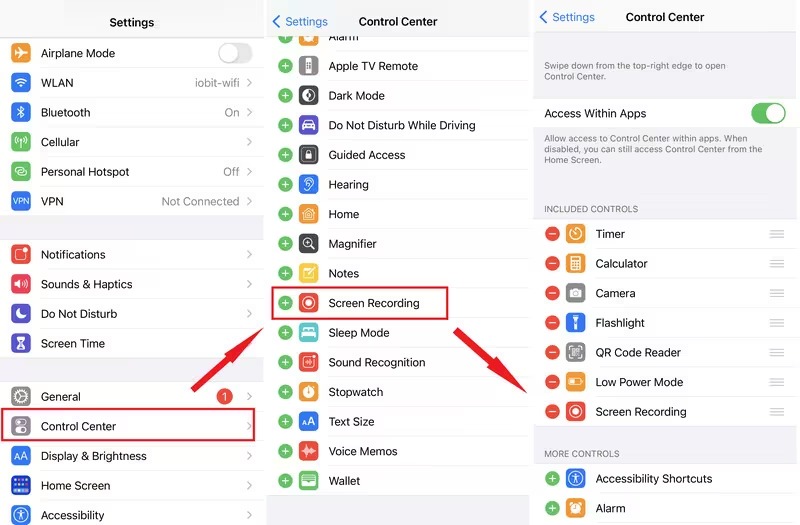
Step 1: Go to the Settings menu and press the Control Centre button.
Step 2: Press the Customise Controls button. Now press the “Screen Recording” button.
Step 3: From any screen’s bottom edge, swipe up.
Step 4: Click the record button and start recording.
Step 5: If you want to stop recording, tap the red notification icon on the screen and choose Stop.
Record Screen Using a Built-in Android Tool:
There are other simple screen recording features available on your Android device. The Android screen recorder, similar to other built-in screen recorders, does not support real-time editing, so in order to utilize the recorded video, you must export it to a different format. Proceed as follows:

Step 1: To access your quick settings, drag down the notification panel at the top of the screen.
Step 2: Press the screen recorder option when you find it.
Step 3: After confirming that you want to record the display, you can start recording.
Step 4: When done recording, tap stop.
Step 5: After that, you may watch the video by saving it to your phone’s library.
Conclusion
Recording webinars has always been an excellent idea for people to use afterward. Now, you know how to record a webinar on all devices to have a better understanding and a consistent source of information for people who joined the meeting and those who did not. Always opt for recording software that can quickly help you carry out the process. EaseUS RecExpert is best known for this job and can help you record a webinar, edit, and share it as per your needs. Download and try EaseUS RecExpert now and enjoy recording your webinars and meetings seamlessly with complete privacy.
More explainers
About The Author

Jean Liu
NEXT UP